3ds max(2016+) model to unity(5.5+) prefab
When I was eventually aware that we were about to use 3ds max as the modeling tool for the “somewhere in china revolutionary monumental digital 3d museum” project … I need to figure out the workflow between a 3dsmax model and a unity project Prefab.
It’s hard to find a guy who is familiar about Maya, 3dsmax is still the No.1 choice for building structure modeling in Shenyang. Blender? They don’t know what are you talking about.
So, let’s get started.
Let’s agree on this first. To the concept, a game engine renders all the elements dynamically in real-time, so everything you see from a 3d modeling tool rendering wouldn’t be absolutely the same when it comes to unity(It could be, but we need time to tune them).
.max to .fbx
Imagine that the 3d designers put plenty of time to build up the models, set up the lights, and make a wonderful render output.
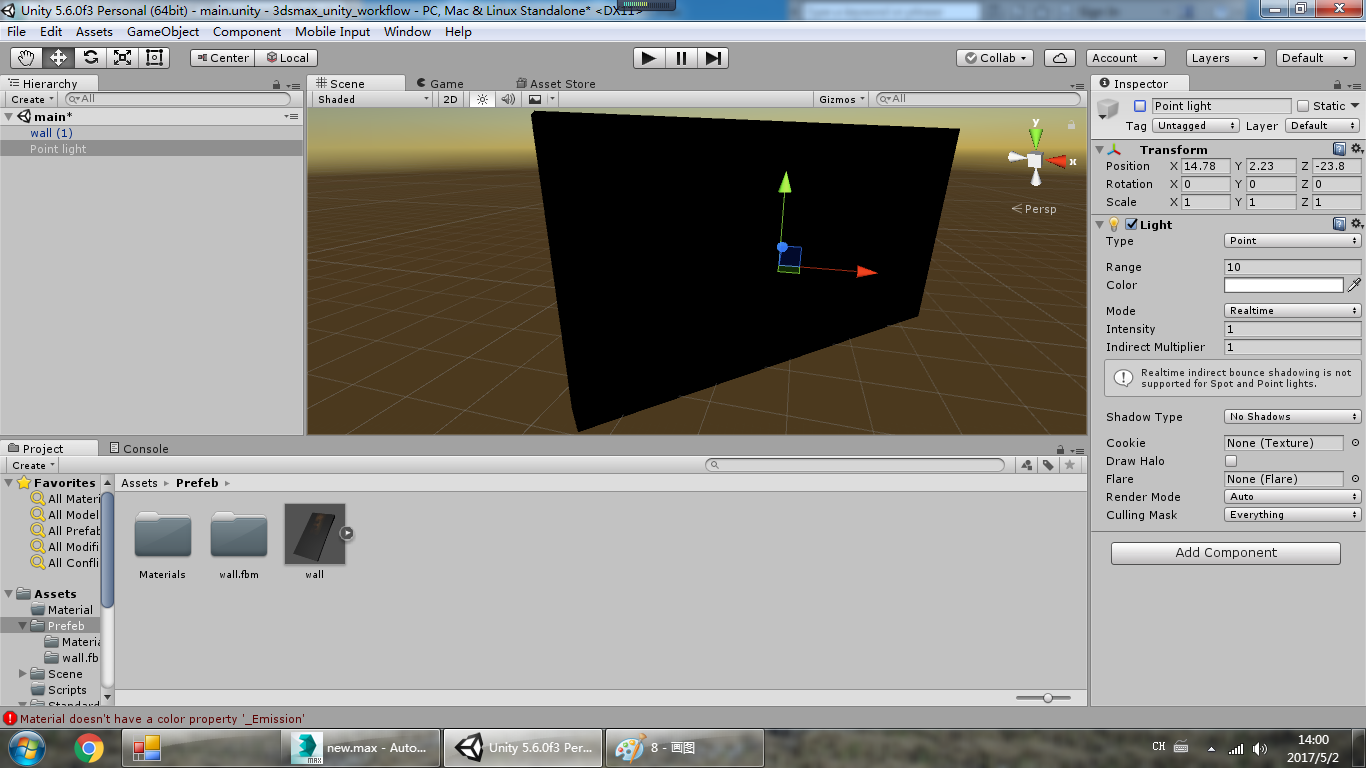
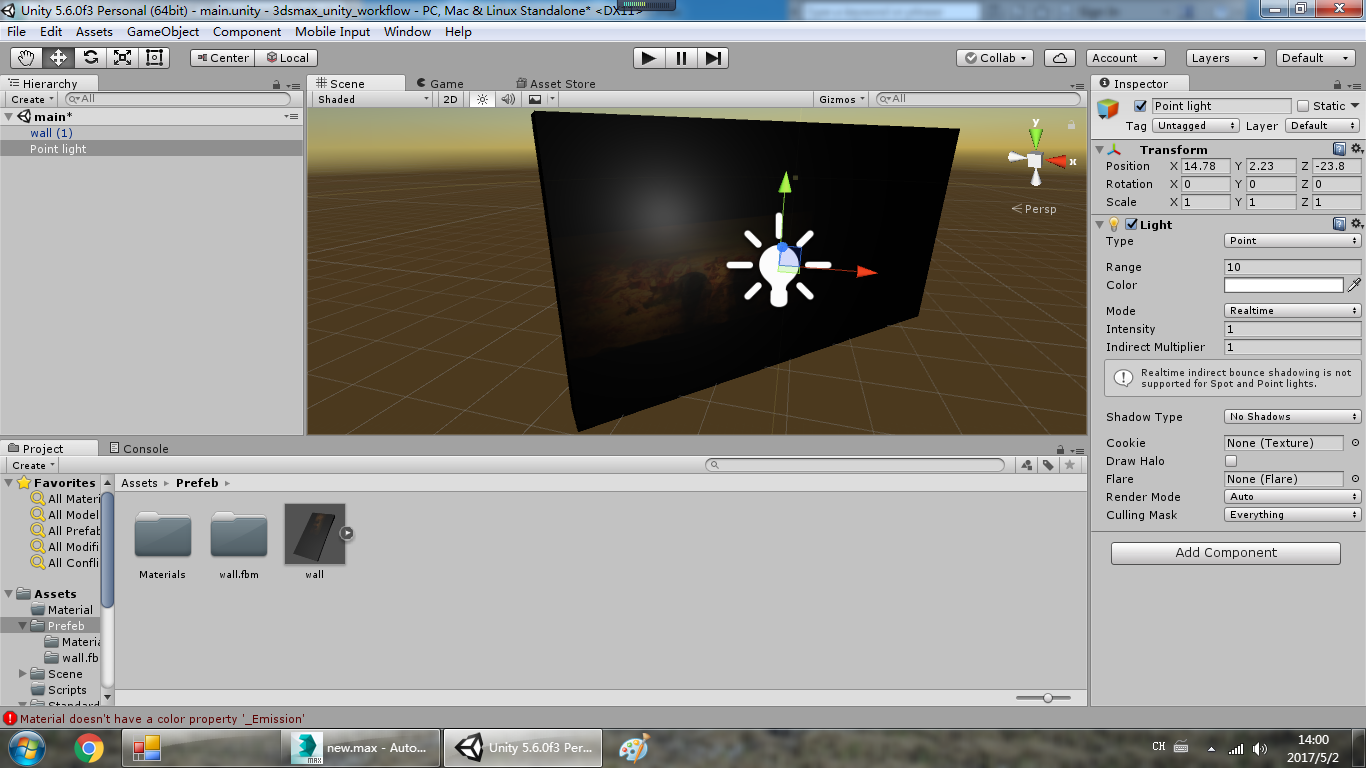
Unfortunately, unity can’t reorganize the lights types from 3dsmax. You’ll find out that all the light become a game object after you export the scene to FBX format(at least this is the official recommendation). Thus, I tried several times and wish it can export the whole scene including models, materials, lights, etc. But the fact was, I received a black scene without light effect at all.
I was frustrated, should I replace all of them by myself? If so, the 3d designer’s talent work are gonna be wasted.
Baked texture and wrap them to the models
The course from cgcookies.com makes me understand that, In Blender, I can use a high-resolution bitmap texture which baked from a high fidelity model on a low fidelity model. Like a fake corrugated paper Porsche case running on a Quadricycle. So I wonder what if I can bake all the texture into unwrapped UV bitmap, then bring them into unity.
Yes, it works. It’s called, “Render to texture” in 3ds max.
Render to texture in 3ds max
Select the model you wanna to render by selection tool.
Choose “Render to texture” under the menu “Rendering” which the shortcut key is 0.
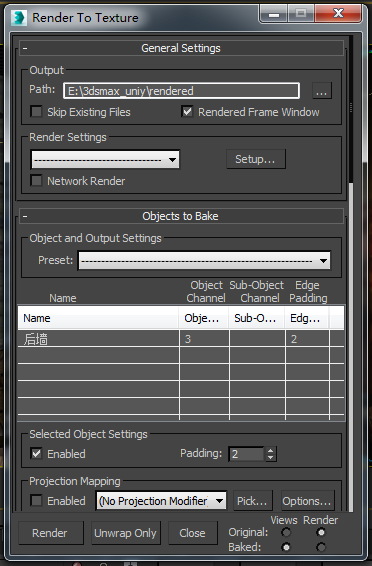
Here you have some preparation to do before render.
Out put path is the place you store the rendering result.
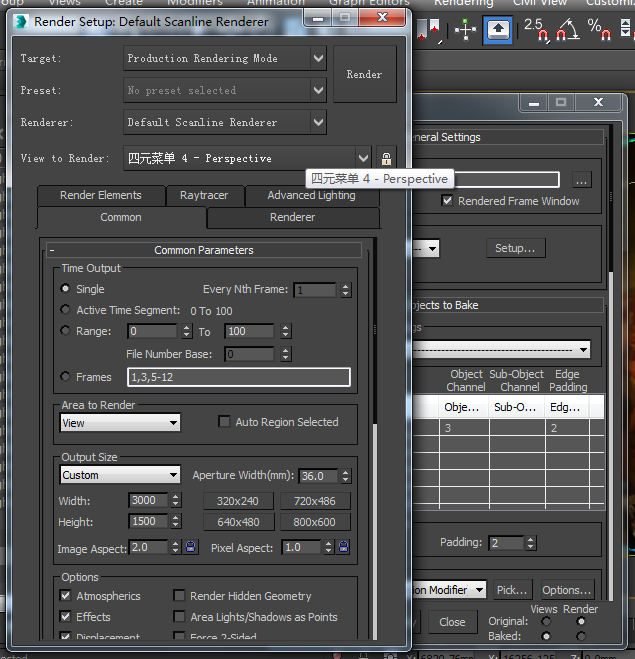
Render Settings contains some options, leave all the others default except Renderer. If you wanna render with VRay or another render plugin, definitely switch it here.
In Mapping Coordinates, choose use automatic unwrapping and leave the channel to 3.
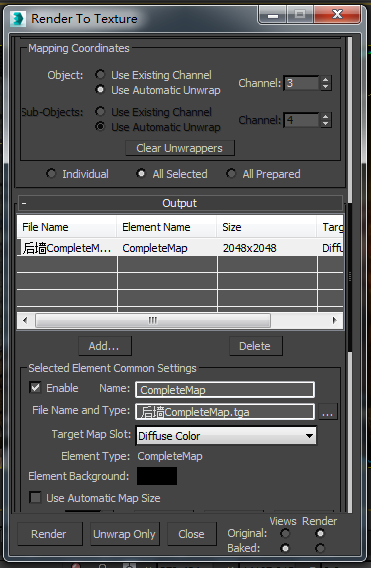
Add texture element in output table, here what I need is a simple “CompleteMap”
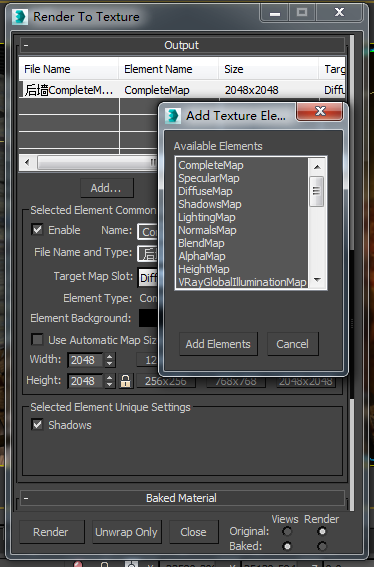
You can change the output format by clicking this no-sense button
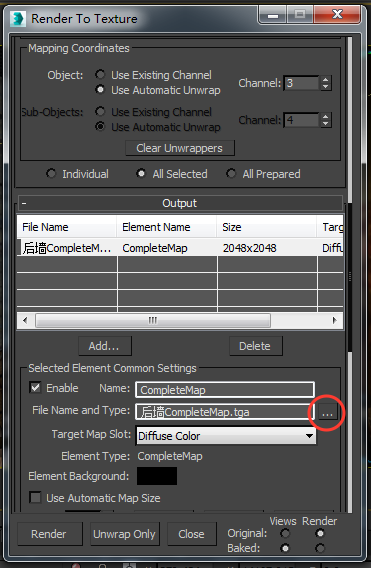
Set the Target Map slot to “Diffuse Color”
Check the “Use Automatic Map Size” if you’re not sure what size it should be. And also here is the way you can increase the output resolution of the image, I do need it remain high if it’s a functional introduction image.
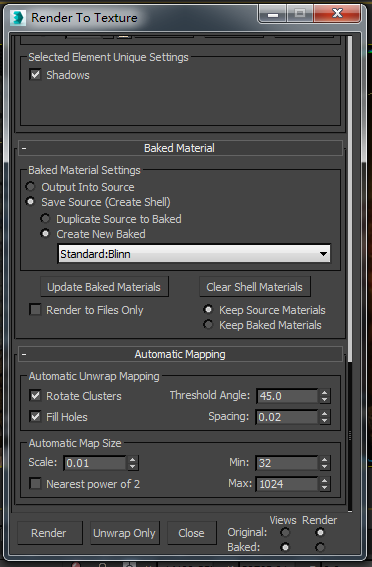
Switch Baked Material to “Save Source” -> “Create New Baked” -> “Standard: Blinn” (I’ve no idea what it exactly is, but it works for me)
That’s all I did, click Render.
If you rendered something but you finally find the model doesn’t have any texture on it but just black. Don’t panic, chick the material of the object. You might find that the bitmap is working on some other slot, not the diffuse color. In my case, it comes from the maloperation when you scroll your mouse on the “Render to texture” panel in purpose to go to the bottom. But in fact it was scrolling some option else, then you’ll finally receive a ridiculous result.
.max to .fbx again
Now what we want to export are only the model with bling-bling baked materials!
- In the FBX export panel, uncheck Animation(I don’t have those animations yet), Cameras, and Lights.
- Check the Embed Media option.
- Change the FBX file format to Version 2016 or higher.
- OK
The darkness before dawn.
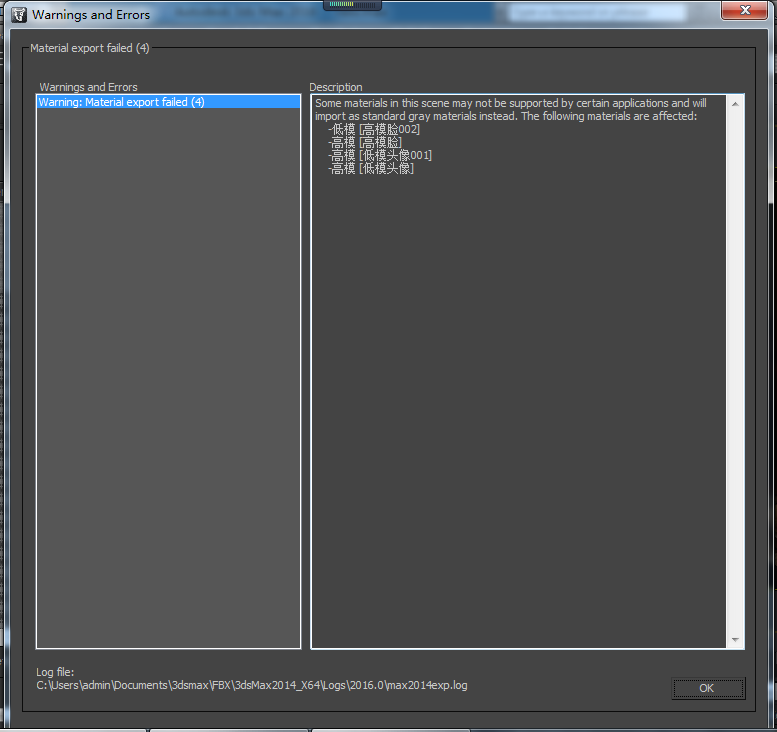
If you succeed after this steps, we’re probably working in different universes. Because there will be an error says “Some materials in this scene may not be supported by certain applications and will import as standard gray materials instead” That sucks!
I reviewed the material on the object when I encountered this, I found that the type is “Shell Material”. That’s the problem. Here is how Autodesk represents Shell Material
When you use Render To Texture to bake a texture, it creates a Shell material that contains two materials: the original material used in the rendering, and the baked material. The baked material uses a bitmap that is saved to disk by Render To Texture. It is “baked,” or attached to an object in the scene.
It’s not a magic box, it’s just a container which keeps the context of baked, in fact, my choice leads this result because later I found a comment said (Create Shell) beside “Save Source” option.
I can simply change the type to “Standard”, and choose a bitmap image as the target. But think about it when you need to repeat this on thousands of objects. That can be a disaster. The gift of being a programmer told me that there must be some smarter way, like MaxScript.
MaxScript: from shell material to standard one
Like any sophisticated platform, 3ds max (Sorry, every time I read 3ds, Mario would appear with his slogan in my mind), has its own script support for users who want to extend functions. I put 10 mins to find out the script I need:
1 | for o in geometry do |
Even I am not familiar with MaxScript I can still easily understand that the code is iterating all the geometries in the scene, and set their material to Standard Material if it is a Shell Material.
Another try to export succeed as I expected.
Next, I drag this .fbx file into the Unity and wish it starts sparkling, and I was disappointed. We still have some steps to complete.
If you’re working on 3ds max 2017, you’re gonna find an export option called export to a game, that’s a pretty much friendly option for game developers like me.
Adjusting & Adapting in Unity
Don’t worry if you find the models are still in the wrong situation. If you look closely like I did, you’ll realize that the materials are INDEED covering the models (And a point light manually in front of it).
So here are the problems:
- The image is attached to a wrong position.
- There should be a way to light it up.
Do the export step again helps me found that you can choose “Axis Conversion” to decide the up Axis. In Unity, the up axis is Z, same to 3ds Max. So this is not the key point to the problem.
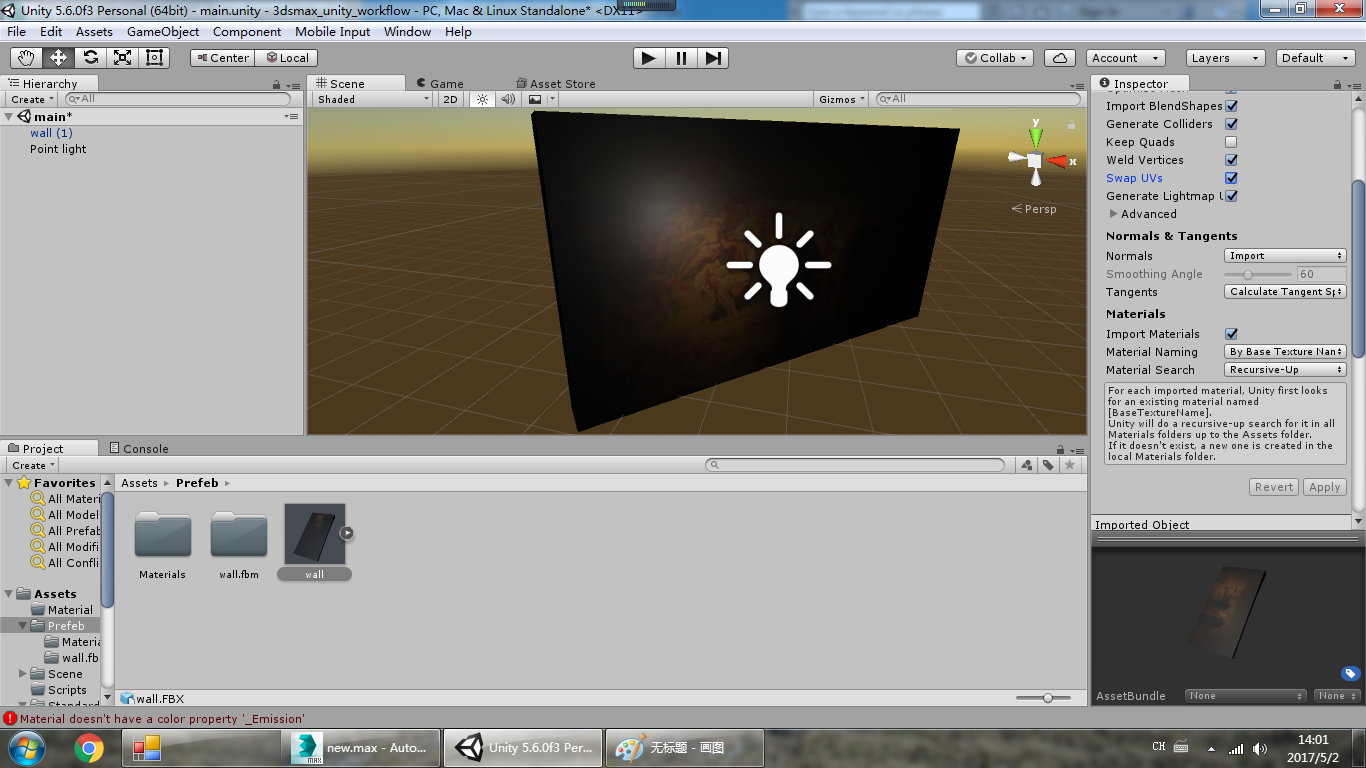
When you import some assets into Unity, like an FBX, You have some additional settings to apply. So here Choose “Swap UV” solved problem ONE.
I found another link to solve problem TWO. If you baked texture with lighting effect, you shouldn’t use the Standard shader to render it in Unity.
By switch, the shader of the object to “Legacy Shaders” -> “Self-Illumin” -> “Diffuse”.
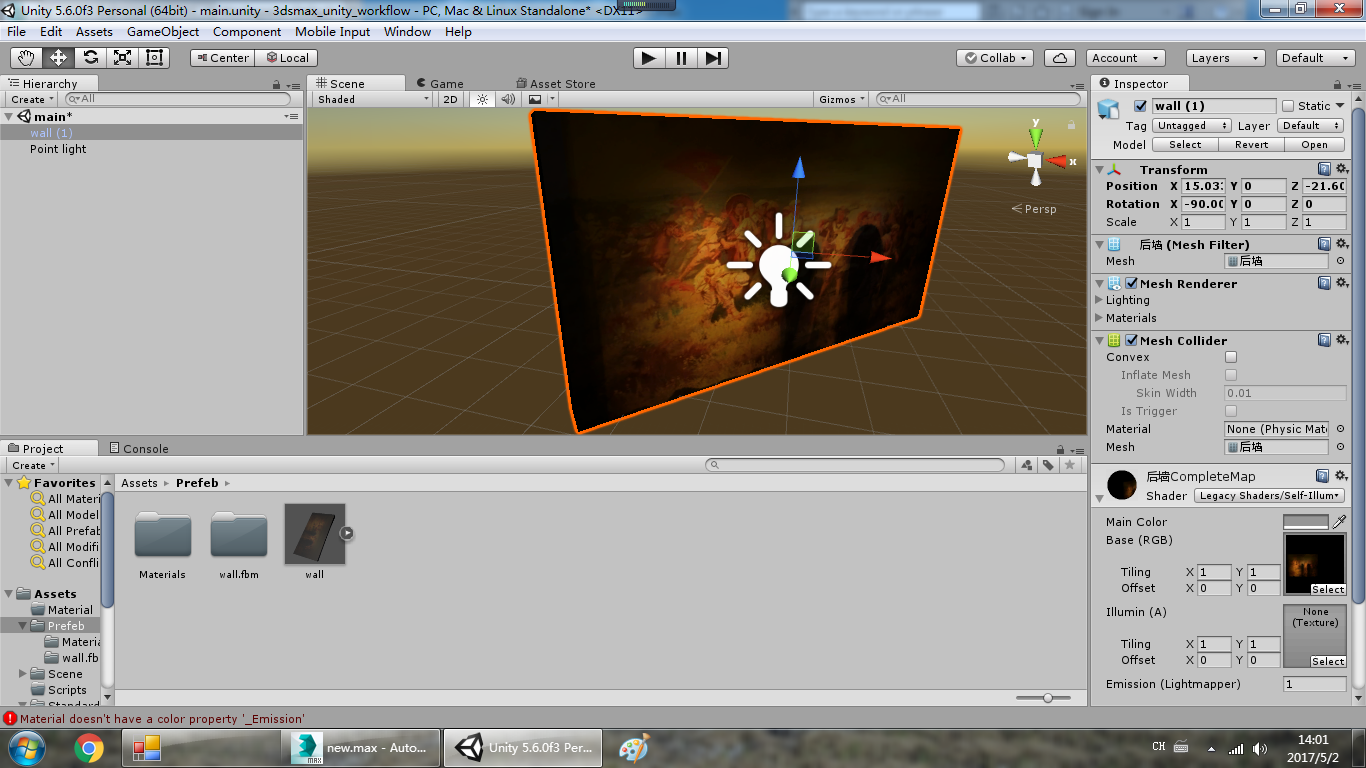
Eventually, it appeared.